
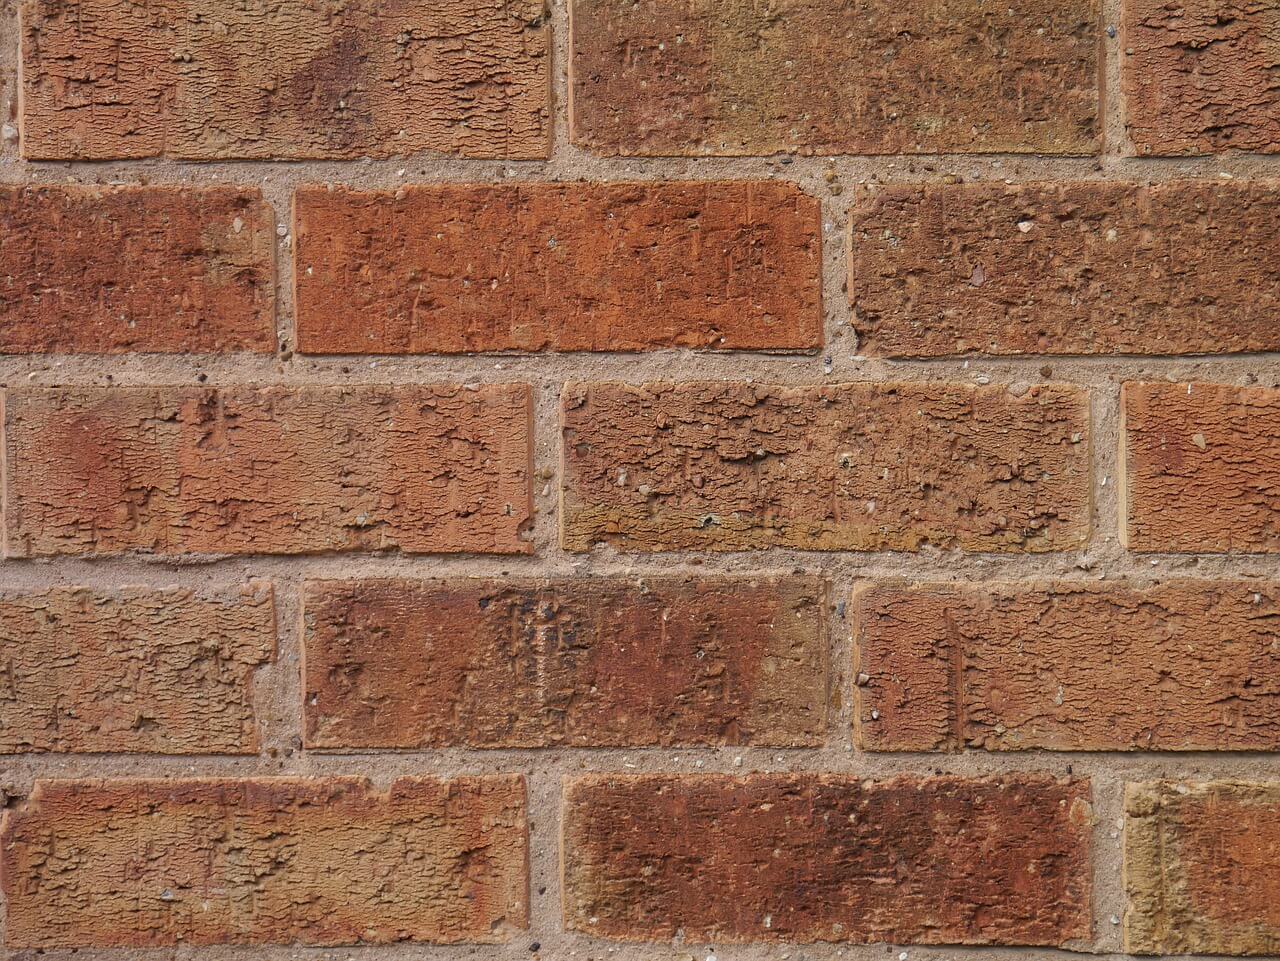
29 Jan Applying the Pointing Mortar
Building and home inspection
Pick up a little sausage of mortar on the back of a small pointing trowel and push it firmly into the upright joints. This can be difficult to do without the mortar dropping off, so hold the mortar board under each joint to catch it.
Try not to smear the face of the bricks with mortar, or it will stain. Repeat the process for the horizontal joints. The actual shape of the pointing is not vital at this stage.
Once the mortar is firm enough to retain a thumb print, it is ready for shaping. Match the style of pointing used on the rest of the house (see below style type). When the pointing has almost hardened, brush the wall to remove traces of surplus mortar.
Shaping the mortar joints:-
The joints shown here are commonly used for brickwork but they are also suitable for stonework. Additionally, stone may have raised mortar joints.
Flush Joints:-
Is the easiest profile to produce, a flush joint is used where the wall is sheltered or painted. Rub each joint with sacking material, starting with the verticals joints.
Rubbed (rounded) joints:-
Bricklayers make a rubbed or rounded joint with a tool shaped like a sled runner with a handle: the semi-circular blade is run along the joints.
Improvise by bending a short length of metal tube or rod. Use the curved section only or you’ll gouge the mortar. Alternatively, use a length of 9mm diameter plastic tube.
Raked joints:-
A raked joint is used to emphasise the type of bonding pattern of a brick wall. It’s not suitable for soft bricks or for a wall that takes a lot of weathering. Scrape out a little of the mortar then tidy up the joints by running a 9mm lath along them. There are ready made raking tools available from your local hardware shop.
Weather struck joints:-
The sloping and smooth profile is intended to shed rainwater from the wall protecting the mortar joint. Shape the mortar with the edge of a pointing trowel. Start with the vertical joints, and slope them in either direction but be consistent. During the process, mortar will tend to spill from the bottom of a joint, as surplus is cut off. Bricklayers use a tool called a `frenchman‘ to neaten the work: it has a narrow blade with the tip bent at right-angles. Make your own by bending a thin metal strip then bind insulating tape round the other end to form a handle. You will find it easiest to use a Wooden batten to guide the blade of the frenchman along the joints, but nail scraps of plywood at each end of the batten to hold it off the wall.
Align the batten with the bottom of the horizontal joints, then draw the tool along it, cutting off the excess mortar, which drops to the ground.
If you have any further questions please call our office.
We want you the reader to write to us on, any Building matters and questions or if you seek advice, we will gladly answer any topic that you wish us to discuss, so please send your letters to “BHIS” C/O. 17 Battye Road, Kardinya, W.A. 6163. Or fax/ph. (09) 331-3031